


Make Your Own DIY Photo Display Using Rocks
Digital photos are great for sharing online, and when you want to give a thoughtful gift, they’re easy and inexpensive to print. But then what? Here’s an easy DIY photo display you can create for those prints. All you need is some rocks, paint, and wire. This would make the perfect Mother’s Day gift, birthday present, or a just-because item. Best of all, it’s a project kids can do entirely on their own. Plus it’s a creative and easy way to promote independence. The video below shows a 9-year-old making the rocks herself. But if you prefer written step-by-step instructions for this DIY photo display, keep reading because we have those, too.
Watch how to make this DIY photo display.
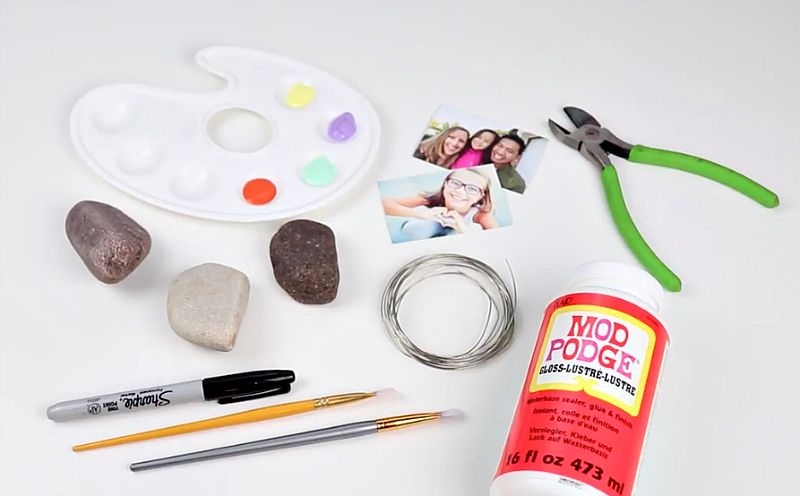
Here’s what you’ll need:
- Rocks
- Paint
- Mod Podge
- Brushes
- Sharpie
- 20-gauge wire
- Wire cutters
- Photos
Step 1: Prep rocks.
Gather rocks and wipe them clean with a damp cloth. Allow the rocks to dry before moving to the next step.
Step 2: Paint.

Paint the rocks with acrylic craft paint, making sure to paint all sides of the rock. Let the first coat dry and add another to make the color more vibrant. When this paint is dry, move on to adding fun details. You can use a Sharpie to write a message on the rocks or use white paint and a fine-tip brush to add decorative details. (Paint pens work well, too.) Let dry.
Step 3: Seal.
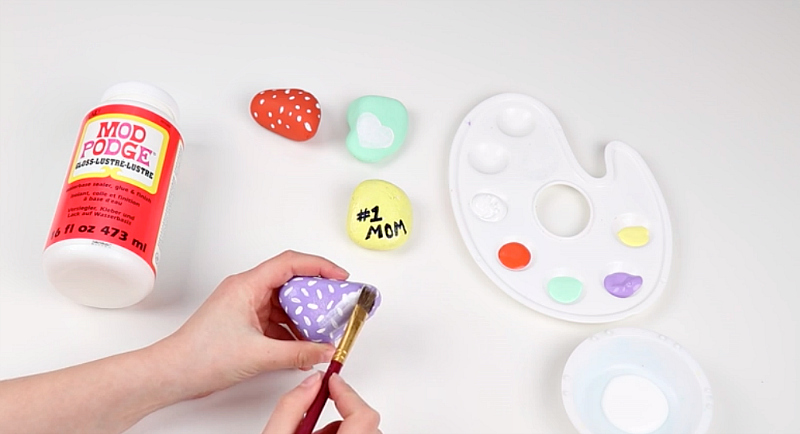
Paint on a thin coat of Mod Podge. This seals the rocks and protects the art work. When you use the glossy version, it also gives a nice shine to the rocks.
Step 4: Add wire and your DIY photo display is ready.
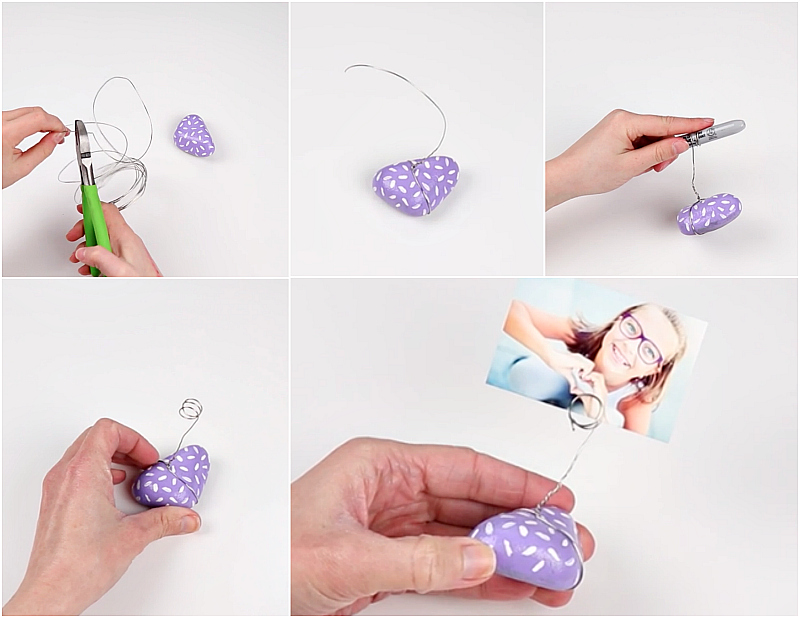
Using a wire cutter, cut a length of 20-gauge wire to about six to 12 inches, depending on the size of the rock. Wrap one end around the rock and twist the end around the stem to secure it in place. You can use pliers or your fingers for this step. Take the other end of the wire and wrap it three times around a Sharpie to create a photo holder. Pull the Sharpie out of the loop and insert a photo.
Looking for another project to try? Make beeswax food wraps.


Comments are not active.